I think the sunshine brings out the best in me and everyone around me. I popped to London in the week and I could have sworn I was in a village, all good-natured banter and helpfulness. Chatty bus drivers? Whatever next?
I saw some brilliant work at my old college/uni/place of divine learning
The degree shows are here again and I love going back to my old London and checking out the action.
BA Photography at LCC at The University of the Arts was very visionary.
BA Book Arts in the same venue was, as always, thought provoking and I have seen the future of books!
{I'm not sure I understood it all but I got a momentary glimpse & a couple of Eureka moments}
BA Sound Arts debuted this year and I was blown off my plimsoles with it.
W.O.W
Kinetic sculptures & noise at unbelievable frightening, disturbing levels.
Freaking Amazing.
I was almost speechless if I could have heard myself think.
Head down to the Elephant & Castle for the action.
Head down to the Elephant & Castle for the action.
I'm almost pretty certain that the introduction of the odd French fried word in my vocab these days is down to the visitations of a certain Frencharian to my blog. Go see hers ici It must really suck to live in France on croissants and romantic breathy films whilst being drunk on joie de vivre.
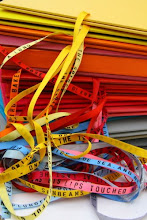
Meanwhile back in lino cutting heaven, back to the ranch and we are debuting too.
With the cutting.
With the cutting.
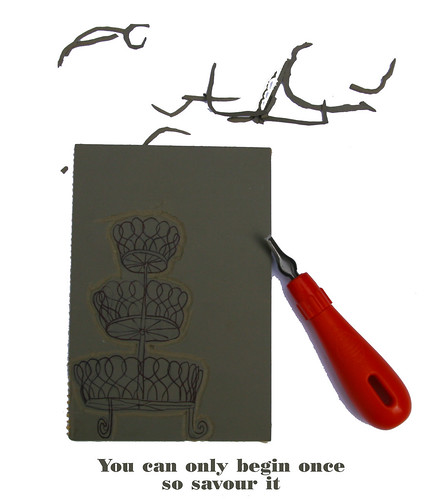
The first cut is the deepest and all that
Bon Chance Mes Lovelies Bon Chance
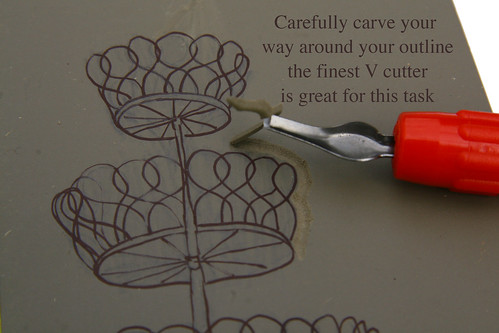
Guiding your blades around your outline is a good way to establish the boundaries of your design. Think of it as carving a little moat. You'll revisit and add details later. Maybe even after a test print. You can always cut more away later but not add to it so take it easy with the process. It's so easy to carry on cutting because of the therapeutic and meditative qualities this process invokes. Reign it in mes enfants. Reign it in.
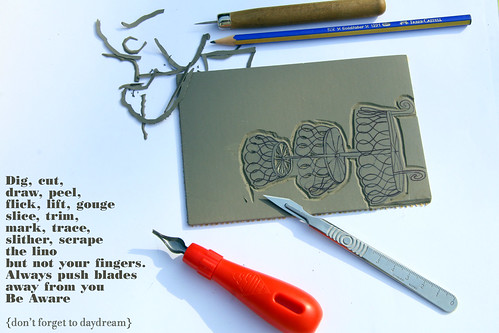
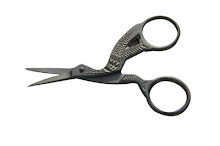
Cut and carve with your blades {a scalpel can be very useful at this stage} Some of the more fiddly details can
be drawn with the blade and then lifted out with anything 'pokey'. I love my etching needle for this.
Remember the flat part of lino that you take away from your design will not print.
I want all the 'holes' in my cakestand to be holes so I have very carefully and painstakingly removed them.
And I am still here. I didn't swear.
I made like a yogi printmaker and adored the fact that I was alive doing this.

Next time, which will be a lot sooner then this time I shall show you the inking and printing process.
Any questions? Post them as comments so everyone can see.


3 comments:
Ah, I envy you the Degree Shows! Especially the Book Arts... ahhhh...
Thanks for this tutorial. I never thought to use a scalpel blade for the tricky little bits (Duh!). Great idea.
My collection of hand-carved stamps is going great guns. I now have a small Really-Useful-Box-full. DS had a go yesterday. He drew up his design, transferred it to the little lino circle and cut it out. It looks pretty good, though he added some extra "bark" texture, so it looked as if it was carved on a tree - now he's not so sure if he likes it. We'll print it up later and see. He can always do another - I've just ordered a load more lino pieces, yay!!
I'll add the link to your Tutorial to my Blog.
I think I need to adopt some of your Yogic calm today - Monday is "jobs day" and I always find it stressful.. and I have to miss my yoga class, because the car is broken (boo...).
A bientot, Louise!
ooohh la la ma petite coupeuse!
Yes, degree shows are the best, so full of energy and enthusiasm...unlike us poor dears who have grown jaded and a bit "am I bovvered" about the whole thing.
et merci pour ton mention (yes it's hard eating croissants du matin au soir)
my love is sans fin...bisous x
Good post and this post helped me alot in my college assignement. Say thank you you as your information.
Post a Comment